
Changing your car’s oil is one of the most essential maintenance tasks to keep your engine running smoothly. For DIY enthusiasts, it’s a rewarding way to save money and gain hands-on experience with your vehicle. However, removing a stubborn oil filter can quickly turn a simple oil change into a frustrating ordeal—especially if you’re new to the process. Enter the Hyper Tough oil filter wrench, a reliable and affordable tool designed to make oil filter removal a breeze. But how do you use it effectively without risking damage to your car’s filter housing or engine components? In this beginner’s guide, we’ll walk you through everything you need to know about using a Hyper Tough oil filter wrench safely and efficiently, ensuring your oil change is hassle-free and your vehicle stays in top shape.
Why You Need an Oil Filter Wrench for Your Car
Before diving into the step-by-step process, let’s understand why an oil filter wrench is a must-have for any DIY mechanic. The oil filter plays a critical role in your vehicle’s lubrication system, trapping dirt, debris, and contaminants to keep the engine oil clean. Over time, these filters become clogged and need replacement during routine oil changes. However, oil filters can be notoriously difficult to remove due to tight threading, oil residue, or limited access in the engine bay.
The Hyper Tough oil filter wrench is designed to grip the filter securely, providing the leverage needed to loosen it without slipping or damaging the filter housing. Available in various models, such as adjustable jaw grips or cap-style wrenches, it’s versatile enough to handle a range of filter sizes, typically from 2.5 to 4.75 inches in diameter. Its sturdy construction, often made from high-quality steel or anodized aluminum, ensures durability and a firm grip, making it a go-to tool for both beginners and seasoned mechanics.
Types of Hyper Tough Oil Filter Wrenches
Hyper Tough offers several types of oil filter wrenches, each suited for specific tasks and vehicle configurations. Understanding the differences can help you choose the right tool and use it effectively:
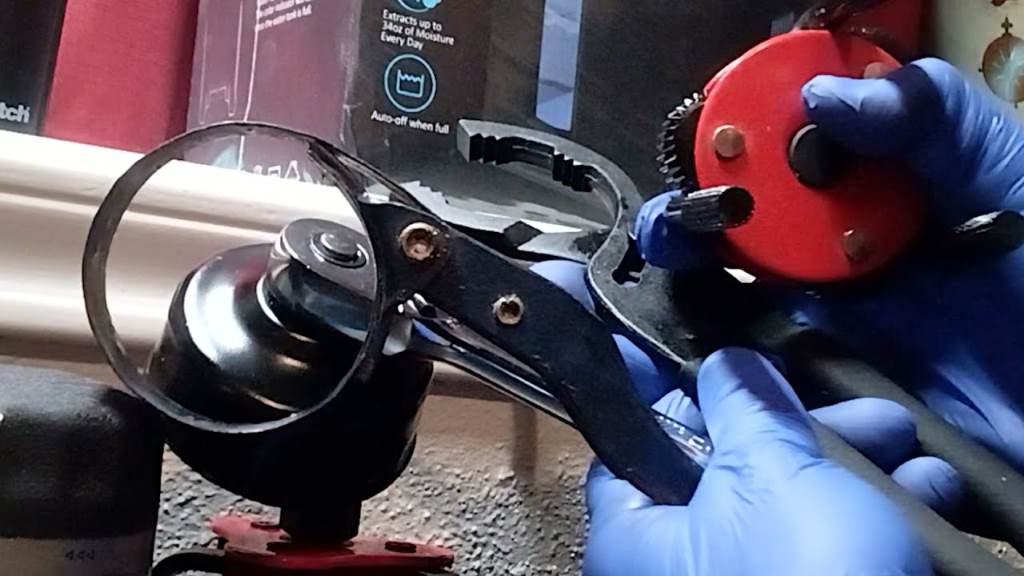
- Adjustable Jaw Wrench: Features a three-jaw design that adjusts to fit various filter sizes (e.g., 63.5mm to 116mm). Its serrated jaws provide a strong grip, ideal for stubborn or oily filters.
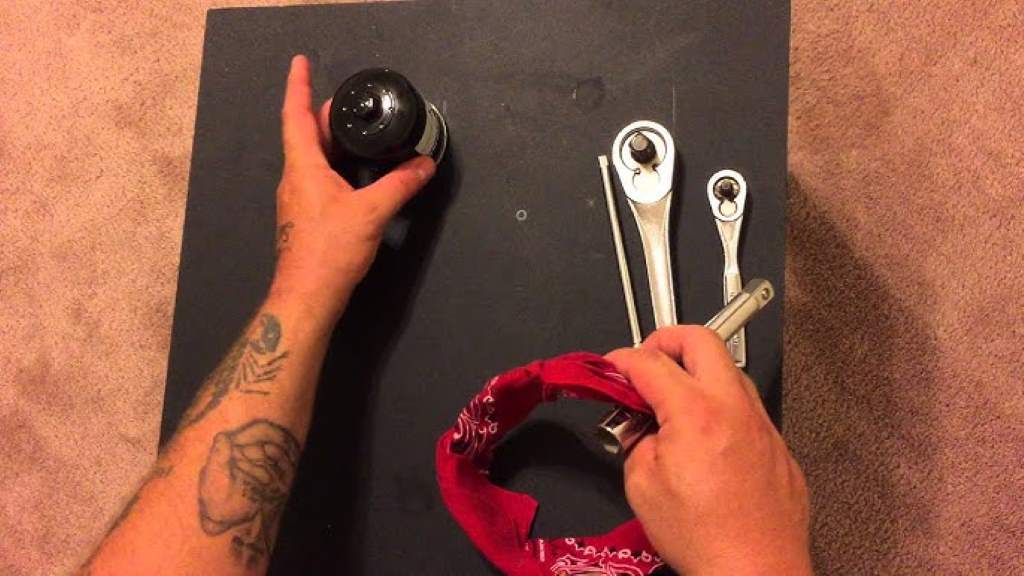
- Cap-Style Wrench: A socket-like tool that fits over the end of the filter, typically used with a 3/8-inch ratchet. It’s perfect for filters with limited clearance or multi-flute designs.
- Strap Wrench: Uses a flexible strap to wrap around the filter, offering a non-marring grip for delicate surfaces. Best for filters in tight spaces but may require more clearance to operate.
Each type has its strengths, so check your vehicle’s oil filter size and engine bay layout to select the most appropriate wrench. Always consult your owner’s manual for specific filter specifications.
Step-by-Step Guide to Using a Hyper Tough Oil Filter Wrench
Follow these detailed steps to use your Hyper Tough oil filter wrench safely and effectively, minimizing the risk of damage to your car:
Step 1: Prepare Your Tools and Workspace
Before starting, gather all necessary tools and materials:
- Hyper Tough oil filter wrench (adjustable jaw or cap-style, depending on your filter).
- New oil filter compatible with your vehicle.
- Engine oil (check your owner’s manual for the correct type and viscosity).
- Drain pan to catch used oil.
- Wrench or socket for the oil drain plug.
- Clean rags, gloves, and safety glasses.
- Jack and jack stands (if accessing the filter from underneath).
Ensure your car is parked on a flat surface, and let the engine cool slightly to avoid burns from hot oil. Warm oil drains better, but it should not be scalding.
Step 2: Drain the Old Oil
- Locate the Oil Drain Plug: Find the drain plug under the car, typically on the oil pan. Refer to your owner’s manual if unsure.
- Position the Drain Pan: Place the drain pan directly beneath the plug to catch the oil.
- Remove the Plug: Use a wrench to loosen the drain plug (counterclockwise) and remove it carefully. Allow the oil to drain completely, which may take a few minutes. Replace the plug and tighten it securely, using a new copper washer if needed.
Step 3: Locate the Oil Filter
The oil filter is usually a cylindrical canister located on the engine block, accessible either from the engine bay or underneath the vehicle. Check your owner’s manual for its exact position, as it varies by make and model. Ensure you have enough clearance to maneuver the wrench.
Step 4: Adjust and Position the Wrench
- For Adjustable Jaw Wrench:
- Turn the adjustment screw or dial to fit the wrench to your oil filter’s diameter (typically 2.5–4.75 inches).
- Position the jaws around the filter, ensuring the serrated teeth grip the metal housing securely.
- Tighten the jaws until snug but avoid over-tightening, which could crush the filter.
- For Cap-Style Wrench:
- Select a cap that matches your filter’s size (e.g., 65-67mm for Hyper Tough’s “F” cap wrench).
- Fit the cap over the filter’s end, ensuring it engages the flutes or knurling.
- Attach a 3/8-inch ratchet to the cap’s drive.
Wrap the strap around the filter near the sealing surface. Tighten the strap until it grips firmly without slipping. Discover How to Rotate Car Tires.
Step 5: Loosen the Oil Filter
Turn the wrench counterclockwise to loosen the filter. Apply steady, firm pressure to break the seal. If the filter is stuck, use a breaker bar or cheater pipe for extra leverage, but avoid excessive force to prevent damaging the filter housing or engine components. Once loose, unscrew the filter by hand and place it in the drain pan to catch any residual oil.
Step 6: Prepare the New Filter
Clean the Mounting Surface: Wipe the filter mounting surface on the engine block with a clean rag to remove debris or old gasket material.
Lubricate the New Filter’s Gasket: Apply a thin layer of fresh engine oil to the rubber gasket on the new filter to ensure a proper seal and ease future removal.
Install the New Filter: Screw the filter onto the engine block by hand until it contacts the sealing surface. Tighten it an additional 1/2 to 3/4 turn using the wrench. Avoid over-tightening, as this can damage the filter or make it difficult to remove later.
Step 7: Refill and Check
- Refill the engine with the recommended amount and type of oil.
- Start the engine and let it run for a few minutes, then check for leaks around the filter.
- Turn off the engine, check the oil level with the dipstick, and top off if necessary.
Step 8: Dispose of Used Oil and Filter
Properly dispose of used oil and filters at a recycling center or auto parts store to protect the environment. Never pour oil down drains or into the ground.
Tips to Avoid Damaging Your Car
Using a Hyper Tough oil filter wrench correctly is key to preventing damage. Here are some essential tips:
- Choose the Right Wrench Size: Ensure the wrench fits your filter snugly to avoid slipping or crushing the canister.
- Avoid Excessive Force: Apply steady pressure rather than forcing the wrench, which could damage the filter housing or nearby components.
- Clean the Wrench After Use: Remove oil and debris to prevent corrosion and ensure long-term reliability.
- Check for Compatibility: Some vehicles, like certain Toyota models, may require specific wrenches. Verify compatibility before starting.
- Don’t Overtighten the New Filter: Hand-tighten plus a 1/2 to 3/4 turn is sufficient. Overtightening can damage the filter or complicate future removal.
- Be Patient: If the filter is stubborn, reposition the wrench or try gentle tapping to break the seal instead of forcing it.
Common Mistakes to Avoid
- Using the Wrong Tool: A mismatched wrench can slip or damage the filter. Always double-check the size and type.
- Working on a Hot Engine: Hot oil can cause burns, and a warm filter may be harder to grip. Let the engine cool slightly.
- Ignoring Clearance: Ensure there’s enough space to maneuver the wrench, especially with strap or band models.
- Skipping Lubrication: Failing to oil the new filter’s gasket can lead to sticking or leaks.
- Improper Disposal: Always recycle used oil and filters responsibly.
Why Choose Hyper Tough?
The Hyper Tough oil filter wrench stands out for its affordability, durability, and versatility. Priced as low as $2.50 at retailers like Walmart, it’s a budget-friendly option that doesn’t compromise on quality. Its adjustable design eliminates the need for multiple wrenches, and its robust construction ensures it can handle even the most stubborn filters. User reviews praise its ease of use and effectiveness, with one DIYer noting it turned a 10-minute struggle into a 7-second task.
However, some users report issues with specific vehicles, like the 2021 Toyota Sienna, where the wrench may not grip well due to filter design or tight engine bay space. In such cases, consider a cap-style wrench or consult your vehicle’s manual for recommended tools.
Conclusion
Using a Hyper Tough oil filter wrench can transform your oil change experience from frustrating to fulfilling. By following the steps outlined above, you’ll remove and install oil filters with confidence, protect your car from damage, and keep your engine running smoothly. Whether you’re a first-time DIYer or a seasoned home mechanic, this versatile tool is a game-changer for routine maintenance.
Ready to tackle your next oil change? Grab a Hyper Tough oil filter wrench, gather your tools, and follow this guide for a seamless experience. Have questions or tips to share? Drop a comment below or join our community of DIY car enthusiasts to exchange ideas and learn more about vehicle maintenance. Keep your car in top shape—happy wrenching!
