
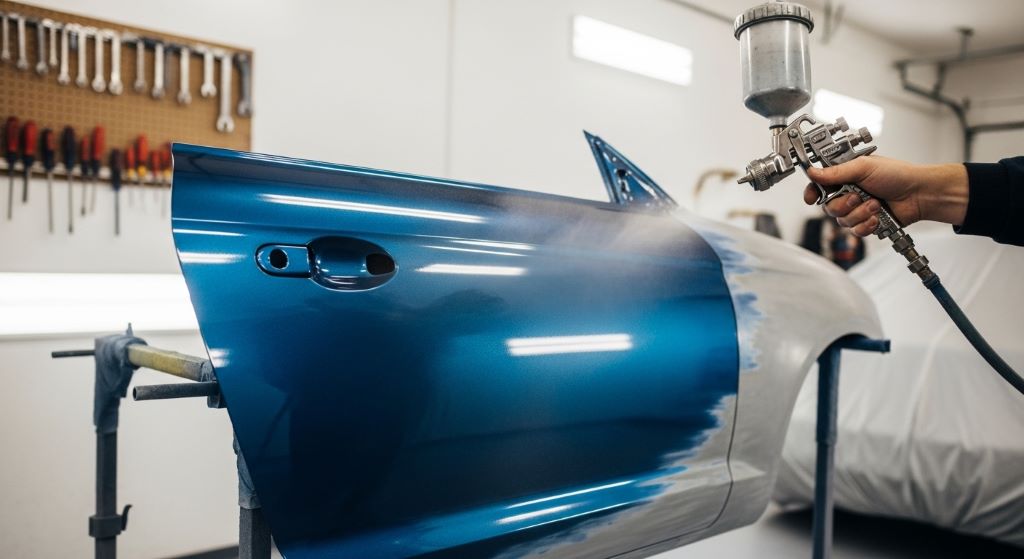
Achieving a professional-looking paint job on your vehicle requires more than just pointing a sprayer and pulling the trigger. Many DIY enthusiasts struggle with runs, orange peel texture, and uneven coverage when they first attempt automotive painting. However, with the right techniques and understanding of your equipment, you can create a smooth, showroom-quality finish in your own garage.
Modern paint sprayers have made it possible for home mechanics to achieve results that rival professional body shops. The key lies in proper preparation, correct equipment settings, and mastering the fundamental application methods. This guide will walk you through everything you need to know to transform your vehicle’s appearance with confidence.
Understanding Your Equipment
Before you begin any painting project, you need to understand how your sprayer works. Different types of sprayers deliver paint in various ways, and each has its own characteristics that affect the final result.
HVLP sprayers, which stands for High Volume Low Pressure, have become the standard for automotive applications. These tools use a high volume of air at low pressure to atomize paint into a fine mist. This design reduces overspray significantly compared to older conventional sprayers, saving you money on paint and reducing environmental impact.
The spray gun consists of several key components that work together. The fluid tip controls how much paint flows through the gun. The air cap shapes the spray pattern and determines how the paint atomizes. The fluid control knob adjusts the amount of material released with each trigger pull. Understanding these parts helps you troubleshoot problems and make precise adjustments.
Additionally, your compressor plays a crucial role in the painting process. An adequately sized compressor maintains consistent air pressure throughout your project. Inconsistent pressure leads to variations in paint application, resulting in an uneven finish. Most automotive sprayers require a compressor that delivers at least 10 to 14 cubic feet per minute at 40 PSI.
Preparing Your Workspace and Vehicle
Preparation determines the quality of your final results more than any other factor. Even the best spray painting techniques cannot compensate for poor surface preparation or a contaminated environment.
Start by setting up your workspace in a well-ventilated area with good lighting. Dust and debris are your enemies when painting. Clean the entire area thoroughly, including walls and ceilings. Consider dampening the floor to keep dust from becoming airborne during painting.
Your vehicle’s surface must be perfectly clean and smooth. Wash the car thoroughly with automotive soap, then wipe it down with a degreaser. Any oils, wax, or contaminants will prevent paint from adhering properly. After cleaning, sand the surface according to your specific project requirements. Fresh paint typically requires 400 to 600 grit sandpaper for proper adhesion.
Mask off all areas you don’t want painted using quality automotive masking tape and paper or plastic sheeting. Take your time with this step. Paint has a way of finding even the smallest gaps. Remove trim pieces when possible rather than masking around them for cleaner results.
Temperature and humidity significantly affect paint application and drying. Ideal conditions fall between 65 and 85 degrees Fahrenheit with humidity below 50 percent. Cold temperatures cause paint to thicken and apply poorly, while high humidity can lead to moisture contamination and poor adhesion.
Mixing and Thinning Paint Properly
Paint consistency directly impacts how smoothly your sprayer applies material. Too thick, and you’ll get orange peel texture or runs. Too thin, and coverage becomes difficult with potential for excessive runs.
Always follow the paint manufacturer’s recommendations for mixing ratios. Most automotive paints require mixing with hardener and thinner at specific ratios. Use measuring cups or mixing ratios cups designed for automotive paint. Eyeballing these measurements leads to inconsistent results.
Strain your paint before pouring it into the spray gun cup. Small particles or dried paint chunks will clog your gun and create defects in your finish. Inexpensive paint strainers are available at any automotive paint supply store.
Test your paint consistency before starting on your vehicle. The paint should flow smoothly off a mixing stick, breaking into droplets rather than streaming continuously. Another test involves spraying a test panel. The paint should lay down smoothly without excessive orange peel or runs.
Setting Up Your Sprayer Correctly
Proper gun settings form the foundation of quality results. Start with the manufacturer’s recommended settings for your specific paint type, then fine-tune based on your results.
Adjust your air pressure first. Most car refinishing tools work best between 25 and 30 PSI at the gun. Measure this at the gun itself, not at the compressor. The pressure drops as air travels through hoses and fittings. Too much pressure creates excessive overspray and dry spray. Too little pressure prevents proper atomization, causing an orange peel texture.
Set your fan pattern next. A wider fan covers more area but requires more careful control to maintain proper overlap. Start with a medium-width pattern and adjust based on the size of the panel you’re painting. Smaller areas benefit from narrower patterns that offer better control.
The fluid control determines how much paint flows through the gun. Start with this about halfway open, then adjust based on your results. Opening it too far increases the risk of runs, while closing it too much requires multiple coats for adequate coverage.
Mastering Application Techniques
How you move the gun and apply paint matters as much as your equipment settings. Developing smooth, consistent technique takes practice but yields dramatic improvements in your results.
Hold the gun perpendicular to the surface at all times. Tilting or arcing the gun creates uneven coverage, with heavy application in the center and light application at the edges. Maintain a consistent distance of 6 to 8 inches from the surface throughout each pass.
Move the gun in straight, overlapping passes. Start your movement before pulling the trigger and release the trigger before stopping your movement. This technique prevents heavy buildup at the beginning and end of each pass. Overlap each pass by 50 percent to ensure even coverage.
Your movement speed affects how much paint lands on the surface. Move too slowly, and runs develop. Move too quickly, and coverage becomes insufficient. Practice on scrap panels to develop a feel for the right speed. Generally, completing a 3-foot pass in about two seconds provides a good starting point.
Apply paint in multiple thin coats rather than trying to achieve full coverage in one pass. This approach, central to effective spray painting techniques, reduces the risk of runs while building a smooth, even finish. Allow proper flash time between coats as specified by your paint manufacturer.
Achieving a Glass-Like Finish
Getting paint on the car is just the beginning. The final steps determine whether your finish looks professional or amateur.
Watch for common problems as you spray. Orange peel texture indicates paint that’s too thick or pressure that’s too low. Dry spray shows up as a rough, sandy texture caused by paint drying before it reaches the surface. Runs occur when applying too much paint in one area. Adjust your technique or settings immediately when you notice these issues.
Consider the painting sequence carefully. Start with less visible areas to warm up your technique before moving to prominent panels. Paint horizontal surfaces like the hood and roof last, as they show defects most readily.
After applying your color coats, clear coat protects the paint and provides the deep, glossy finish associated with professional work. Apply clear coat using the same techniques as your color coats. Multiple thin coats yield better results than fewer heavy coats.
Allow proper drying time between coats and before handling the vehicle. Rushing this process leads to problems like adhesion failure or marks in the finish. Follow the paint manufacturer’s specified dry times carefully.
Troubleshooting Common Issues
Even experienced painters encounter problems occasionally. Knowing how to identify and correct issues saves time and materials.
Runs happen to everyone at some point. If you notice a run developing while the paint is still wet, you can sometimes tip it out by lightly misting over the area. However, if the paint has started to set up, leave it alone and sand it out before applying the next coat.
Fisheyes appear as small craters in the paint caused by contamination on the surface. Silicone is the most common culprit. If fisheyes develop, stop immediately and clean the surface thoroughly before continuing. Adding fisheye eliminator to your paint can help prevent this problem.
Dirt contamination shows up as small bumps in the finish. Some contamination is inevitable, but minimizing it starts with thorough cleaning of both your workspace and the vehicle. After final sanding and polishing, you can often remove small dirt particles without repainting.
Cleaning and Maintenance
Proper care of your car refinishing tools extends their life and ensures consistent performance on future projects.
Clean your spray gun immediately after use. Paint left to dry in the gun creates clogs and affects performance. Disassemble the gun and clean all parts thoroughly with appropriate solvent. Pay special attention to the fluid passages and air cap.
Lubricate moving parts according to the manufacturer’s recommendations. A small amount of gun lubricant on the needle and trigger mechanism keeps everything operating smoothly. Avoid over-lubricating, as excess oil can contaminate your paint.
Store your equipment properly between uses. Keep spray guns in a clean, dry location. Hang them if possible to prevent damage to the fluid tip. Drain your air compressor after each use to remove accumulated moisture.
Safety Considerations
Automotive painting involves hazardous materials that require proper safety precautions. Never compromise on safety equipment or practices.
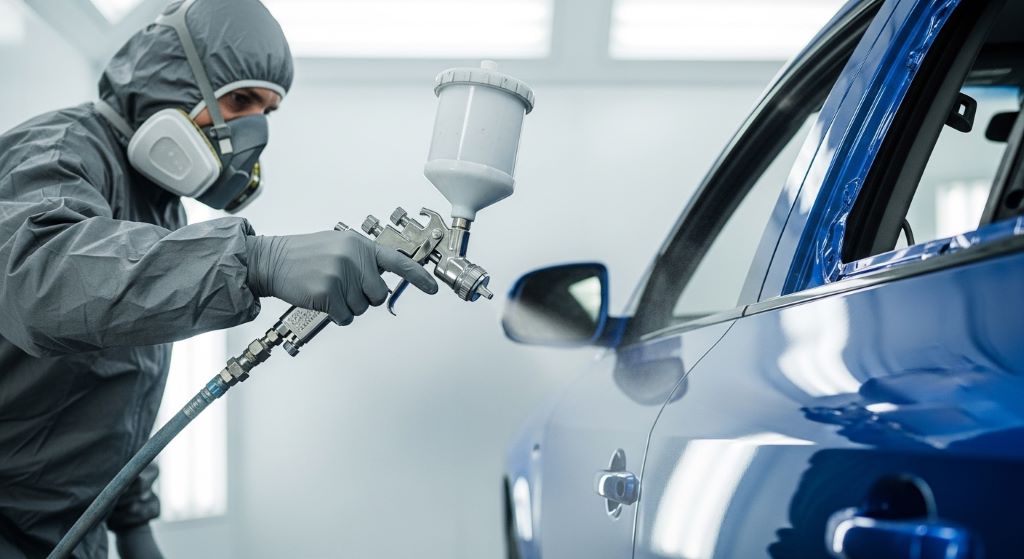
Always wear a proper respirator designed for paint fumes. Simple dust masks do not provide adequate protection from the volatile organic compounds in automotive paint. Invest in a quality respirator with the correct cartridges for paint fumes.
Protect your skin with gloves and long sleeves. Many automotive paints contain isocyanates that can cause serious health problems with skin contact. Nitrile gloves resist paint solvents better than latex.
Ensure adequate ventilation in your workspace. Even with a respirator, good airflow helps remove fumes and maintains a safer environment. Consider using exhaust fans to move air through your painting area.
Conclusion
Mastering automotive paint spraying takes practice, but anyone can achieve professional-quality results with proper preparation and technique. Understanding how HVLP sprayers work and applying correct spray painting techniques transforms your painting projects from frustrating to rewarding.
Remember that preparation accounts for most of your success. Clean surfaces, proper mixing, and correct equipment settings create the foundation for excellent results. Additionally, applying multiple thin coats with proper overlap and distance ensures smooth, even coverage.
Practice these car refinishing tools and methods on scrap panels before tackling your vehicle. Each project builds your skills and confidence. Soon, you’ll be creating finishes that rival professional body shops while saving significant money on labor costs.
Take your time, follow these HVLP sprayer tips, and don’t rush any step of the process. The satisfaction of stepping back to admire a perfectly smooth, glossy finish you created yourself makes all the effort worthwhile. Your vehicle will look stunning, and you’ll have gained valuable skills for future projects.
Frequently Asked Questions
How many coats of paint should I apply for a professional finish?
Most automotive paint jobs require three to four medium coats of color followed by two to three coats of clear. However, the exact number depends on the paint type, color coverage, and manufacturer recommendations. Apply thin coats and allow proper flash time between each coat. Building coverage gradually prevents runs and ensures a smooth finish.
Can I use an HVLP sprayer with a small compressor?
You need a compressor that can keep up with your sprayer’s air demands. Most automotive HVLP guns require 10 to 14 CFM at 40 PSI. Check your sprayer’s specifications and compare them to your compressor’s output. A compressor that’s too small will cause pressure drops during spraying, resulting in an inconsistent finish and poor atomization.
Why does my paint have an orange peel texture?
Orange peel texture typically results from paint that’s too thick, insufficient air pressure, or holding the gun too far from the surface. Check your paint viscosity and thin if necessary according to manufacturer guidelines. Verify your air pressure at the gun reaches the recommended level. Additionally, maintain the proper 6 to 8 inch distance from the surface while spraying.
How long should I wait between coats when painting my car?
Flash time varies depending on paint type, temperature, and humidity. Most automotive base coats require 10 to 15 minutes between coats. Clear coats often need 15 to 30 minutes. Always follow the specific paint manufacturer’s recommendations. The surface should appear dry to the touch but not fully cured before applying the next coat.
Do I need to sand between color coats?
You typically don’t need to sand between color coats if you’re applying them within the recommended flash time. However, if you notice any defects like dirt or runs, sand them smooth before applying the next coat. Always sand between color and clear coat if more than 24 hours have passed. Use 600 to 800 grit sandpaper for this purpose.
Related Topics:
Buying a Used Motorhome? Here’s What You Need to Know Before You Buy
Outlander Campervan Rental Reviews: Comfort, Cost & Road Trip Experience
