
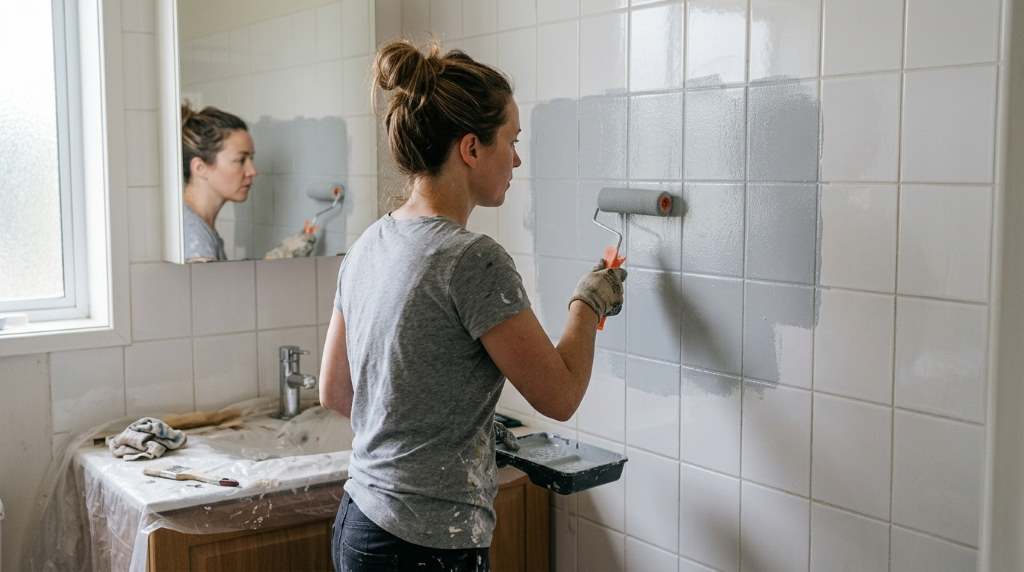
You can paint bathroom tile successfully by cleaning, sanding, priming, and applying moisture-resistant tile paint. Plan for two thin paint coats, then allow the finish to cure fully before exposing it to water. The best results come from painting suitable wall tile rather than heavily used floors. Careful preparation matters more than painting speed, because glossy ceramic surfaces resist ordinary coatings.
Painting bathroom tile can refresh an outdated space without removing every tile. However, the project works only when you match the coating to the surface and moisture level.
Know Which Bathroom Tile You Can Paint
Before buying supplies, inspect the tile location, material, existing finish, and moisture exposure. Ceramic and porcelain wall tiles generally provide suitable surfaces when you prepare them correctly.
However, constantly submerged surfaces demand specialized refinishing products rather than ordinary interior wall paint. Manufacturers also distinguish between decorative tile coatings and products designed for tubs or shower surrounds.
For a broader bathroom makeover, consider how tile color works with modern home decoration ideas. A coordinated color palette can make painted tile look intentional instead of temporary.
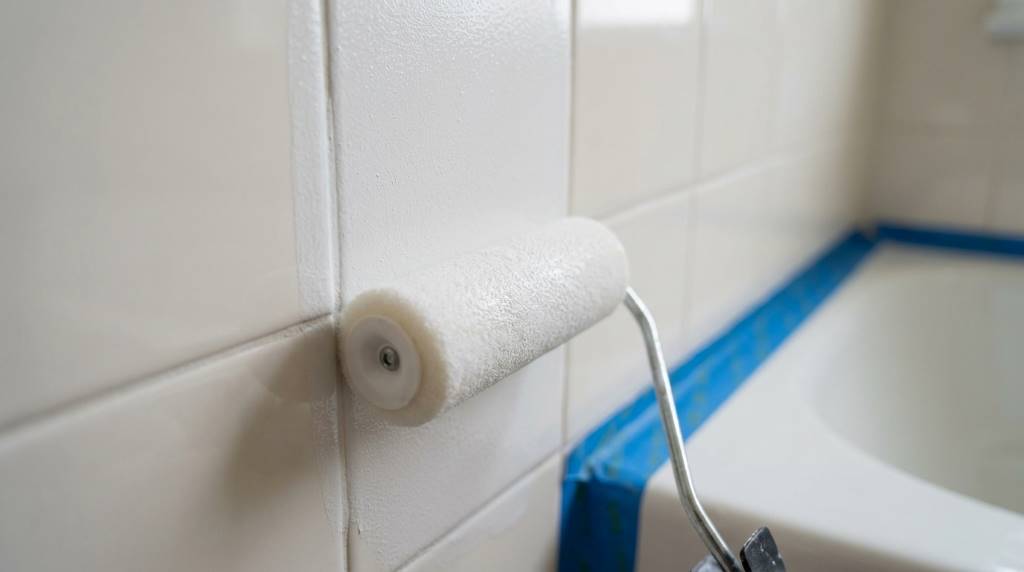
Where Painting Makes Sense
Paint works particularly well on bathroom walls, backsplashes, and decorative tile sections. These areas experience moisture but usually avoid constant abrasion and standing water.
- Bathroom wall tile: A strong candidate for a properly prepared coating.
- Backsplashes: Suitable when the selected coating tolerates moisture.
- Shower walls: Use a dedicated tub and tile coating for frequent water exposure.
- Bathroom floors: Usually require specialized floor coating because foot traffic creates heavy wear.
When You Should Replace Instead
Painting cannot correct loose tiles, serious water damage, unstable grout, or movement behind the tile. Repair structural problems before applying any decorative coating.
Likewise, replace badly cracked surfaces when damage extends beyond the tile’s cosmetic finish. Paint should improve a sound surface, not conceal an unresolved building problem.
Choose The Right Paint And Supplies
Bathroom tile needs stronger adhesion than ordinary painted drywall. Therefore, choose a bonding primer and coating specifically suited to glossy tile or wet-area applications.
For shower surrounds and tubs, specialized epoxy or epoxy-acrylic refinishing systems offer better moisture resistance. Some products can cover ceramic, porcelain, fiberglass, and other compatible surfaces.
Gather everything before starting, because interruptions can compromise preparation and coating consistency.
- High-adhesion bonding primer
- Tile-rated paint or refinishing coating
- Fine-grit sanding sponge or sandpaper
- Degreasing bathroom cleaner
- Nonabrasive scrub pad
- High-quality angled brush
- Small foam or microfiber roller
- Painter’s tape
- Plastic sheeting or drop cloths
- Clean lint-free cloths
- Gloves and appropriate eye protection
- Ventilation equipment when product instructions require it
Do not choose paint solely because the label says waterproof. Instead, verify that the product specifically supports your tile material and intended bathroom location.
Prepare The Bathroom Tile Before Painting
Preparation determines whether your painted tile looks professional or starts peeling prematurely. First, remove soap residue, body oils, mineral deposits, mildew, and cleaning-product buildup.
Use a suitable bathroom cleaner and scrub every tile thoroughly. Then rinse away residue and let the surface dry completely.
Next, inspect the grout and tile for cracks, loose sections, missing caulk, or damaged edges. Repair those issues before continuing with surface preparation.
Remove Silicone And Failed Caulk
Paint generally performs poorly over flexible silicone caulk. Remove old silicone from seams and replace it after the coating has fully cured.
Use a plastic scraper or appropriate removal tool to protect the tile surface. Then clean the exposed joint before continuing.
Sand Away The Gloss
Glossy tile creates a difficult bonding surface, so lightly sanding it becomes an important preparation step. Use fine-grit abrasive material and work evenly across the tile face.
Your goal involves dulling the sheen rather than aggressively removing the tile surface. Avoid deep scratches because uneven abrasion can remain visible after painting.
After sanding, remove every trace of dust with a clean damp cloth. Allow the tile to dry before masking surrounding surfaces.
For larger bathroom projects, this preparation stage deserves more attention than the actual painting. A rushed surface can undermine even a premium coating.
Protect Fixtures And Surrounding Surfaces
Apply painter’s tape around faucets, trim, countertops, fixtures, and adjoining painted walls. Cover floors and nearby cabinets with plastic sheeting or drop cloths.
Remove hardware whenever practical instead of trying to paint around complicated shapes. Cleaner edges usually require less touch-up afterward.
Prime The Tile For Strong Adhesion
Priming creates an adhesion bridge between slick tile and the finishing coating. Choose a bonding primer that specifically lists ceramic, porcelain, or glossy surfaces.
Apply a thin, even primer layer with a suitable roller or brush. Avoid heavy application because thick primer can create ridges, runs, and uneven drying.
Benjamin Moore’s Stix primer, for example, is designed to bond difficult surfaces including glossy tile. Similar high-adhesion primers can work when their labels approve your specific application.
Test Before Priming Everything
Test the primer in a small inconspicuous section before coating the entire bathroom. Let that test area dry according to the manufacturer’s instructions.
Then inspect the surface for adhesion, bubbling, cracking, or unusual discoloration. A small test can prevent an expensive full-room mistake.
Apply Primer Correctly
Start with edges and detailed areas using a quality angled brush. Then use a small roller to distribute primer evenly across larger tile faces.
Work in manageable sections and maintain a wet edge whenever the product instructions recommend it. Most importantly, follow the specified drying and recoating time.
Do not paint over primer simply because it feels dry. Proper curing and recoating intervals help the next layer bond correctly.
Apply Bathroom Tile Paint In Thin Coats
Once the primer has cured, apply the selected tile coating using controlled, thin layers. Avoid trying to achieve complete coverage with one heavy coat.
Begin around corners and edges with a brush, then roll the larger surfaces. Use consistent pressure to reduce roller texture and visible overlap marks.
Let the first coat dry according to the product label before applying another coat. Rushing the second layer can trap moisture and create surface defects.
How Many Coats Should You Apply?
Two thin coats often provide better coverage than one thick application. However, the product label should determine the required number of coats.
Dark tile may require additional coverage when you apply a significantly lighter color. Allow every coat to reach the manufacturer’s specified recoat condition.
Keep The Finish Smooth
Do not repeatedly roll areas after the coating begins becoming tacky. Excessive brushing can create visible marks and disturb the developing finish.
Instead, plan each section before starting and maintain a consistent application rhythm. Good lighting helps you identify missed spots before the coating dries.
Keep dust, hair, and bathroom debris away from the wet surface. Close windows when outdoor debris could enter, while maintaining safe ventilation.
Handle Moisture, Curing, And Bathroom Use
Freshly painted tile may look finished before the coating reaches full hardness. Therefore, distinguish between dry time, recoat time, and final cure time.
Some tub and tile epoxy systems require several days before water exposure. For example, certain refinishing kits specify three days before exposing the coating to water.
Always follow the exact curing period printed on your product. Early shower use can weaken the finish even when the surface appears completely dry.
Improve Bathroom Ventilation
Keep bathroom ventilation running during application and curing when product instructions permit. Good airflow helps manage humidity and supports consistent coating conditions.
However, avoid excessive airflow that blows dust directly onto wet paint. Balance ventilation with a clean, controlled working environment.
Manage Humidity During Application
High humidity can extend drying and curing times for many coatings. Therefore, choose a dry period when possible and follow the product’s environmental requirements.
Do not assume a warm bathroom automatically provides ideal painting conditions. Temperature, humidity, and ventilation can affect coating performance.
Refresh Grout And Finishing Details
Painted tile can look incomplete when stained or damaged grout remains unchanged. After the tile coating cures, inspect every grout line and joint.
Use a compatible grout refresh product when appropriate, rather than applying ordinary wall paint to grout. Keep fresh caulk separate from the painted tile surface when possible.
For bathrooms with pool-adjacent areas, moisture management deserves equal attention. Practical ideas for keeping concrete cool around pools can also inform broader outdoor moisture planning.
Remove Painter’s Tape Carefully
Remove painter’s tape according to the coating’s recommended timing. Pull it slowly at a controlled angle to reduce edge damage.
If the coating has bridged the tape edge, score that connection gently before removing the tape. This approach helps preserve crisp lines.
Maintain Painted Bathroom Tile
Proper maintenance can help preserve the finish and reduce unnecessary wear. Clean painted tile with mild, nonabrasive products approved for the coating.
Avoid abrasive powders, aggressive scouring pads, and harsh tools that can scratch the finish. Instead, use soft cloths or nonabrasive sponges for routine cleaning.
Wipe excessive water from vulnerable areas when practical. Also repair leaking fixtures promptly because repeated water exposure can challenge even durable coatings.
Clean Without Damaging The Finish
- Use mild bathroom cleaners compatible with the coating.
- Choose soft microfiber cloths for routine cleaning.
- Rinse away cleaner residue when product directions require it.
- Avoid abrasive scrubbers on painted surfaces.
- Dry persistent moisture around seams and corners.
- Inspect high-contact areas periodically for wear.
Keep sharp objects away from painted tile whenever possible. Small scratches can become easier entry points for moisture and staining.
Touch Up Small Damaged Areas
Small chips can sometimes receive touch-up coating when the original product permits it. Clean and lightly prepare the damaged area before touching it up.
Do not repeatedly layer touch-up paint over unstable or peeling coating. Remove failing material and repair the underlying problem first.
A neat touch-up should blend into the surrounding finish without creating a raised patch. Test the repair in a discreet location when color matching matters.
Common Mistakes That Ruin Painted Tile
Most failed tile-painting projects trace back to preparation, product selection, or premature moisture exposure. Avoiding these mistakes improves both appearance and durability.
- Skipping deep cleaning: Oils and residue can prevent proper adhesion.
- Leaving tile glossy: Smooth surfaces give coatings fewer opportunities to grip.
- Using ordinary wall paint: Standard paint may not tolerate bathroom conditions.
- Skipping primer: Unprimed tile can produce weak adhesion.
- Applying thick coats: Heavy layers can sag, wrinkle, or dry unevenly.
- Using the shower too soon: Early water exposure can damage curing coatings.
- Painting unstable tile: Movement beneath the coating can cause premature failure.
- Ignoring damaged caulk: Flexible joints can undermine a clean finished appearance.
Another common mistake involves choosing appearance over performance. A beautiful finish means little if the coating cannot handle the intended moisture and wear.
Smart Bathroom Design Choices After Painting
Paint gives you an opportunity to rethink the entire bathroom’s visual balance. Lighter tile colors can make compact bathrooms feel more open and brighter.
Darker colors can create contrast around white fixtures and warm wood accents. Meanwhile, muted neutrals can provide a calmer backdrop for colorful towels and accessories.
Coordinate the tile with hardware, wall colors, lighting, and storage. Even practical additions such as front seat car organizers can inspire compact storage thinking elsewhere.
Choose Sheen With Purpose
A higher sheen can make cleaning easier, but it also highlights surface imperfections. Therefore, inspect the tile carefully before choosing a highly reflective finish.
Satin or semi-gloss appearances can provide a balanced visual effect when the selected coating supports that sheen. Follow the product’s available finish options rather than mixing incompatible systems.
A Simple Bathroom Tile Painting Checklist
Use this checklist before opening the paint container. Completing every preparation step creates a more predictable project.
- Inspect tile condition.
- Confirm the coating suits the location.
- Remove damaged caulk and repair defects.
- Clean away soap, grease, and mineral residue.
- Rinse and dry the tile completely.
- Sand glossy surfaces evenly.
- Remove sanding dust.
- Mask fixtures and surrounding surfaces.
- Test primer adhesion.
- Apply the recommended primer.
- Observe the required drying period.
- Apply thin tile-paint coats.
- Respect recoat and curing times.
- Remove tape carefully.
- Recaulk suitable joints after curing.
- Wait before exposing the surface to water.
This sequence keeps the project organized and reduces avoidable mistakes. More importantly, it separates preparation, application, and curing into deliberate stages.
Conclusion
Learning how to paint bathroom tile becomes straightforward when you treat preparation as the foundation. Clean thoroughly, remove the glossy surface, use a suitable primer, and select coating designed for your tile’s conditions.
Then apply thin coats, respect drying intervals, and protect the finish during curing. Start with a small test area, follow your product instructions, and take your time for cleaner results.
If your bathroom tile looks dated but remains structurally sound, painting can provide a practical transformation. Gather the right supplies, prepare carefully, and give the coating enough time to become durable.
Frequently Asked Questions
Can You Paint Bathroom Tile Without Sanding?
You should sand glossy tile because creating a slightly rough surface improves coating adhesion.
What Kind Of Paint Is Best For Bathroom Tile?
Use a tile-rated epoxy, epoxy-acrylic, or compatible high-adhesion coating designed for your bathroom surface.
Can You Paint Shower Tile?
Yes, but choose a dedicated tub and tile refinishing system designed for frequent moisture exposure.
How Long Should Painted Bathroom Tile Cure?
Curing time varies by product, so follow the manufacturer’s exact water-exposure and full-cure instructions.
Can You Paint Bathroom Floor Tile?
Yes, but use a floor-rated coating because ordinary tile paint may not withstand repeated foot traffic.
